Wednesday, 8 January 2025

Seeing Green: A Hi-Vis ’74 Rickman CR900 Selling at Mecum

1974 Rickman CR900
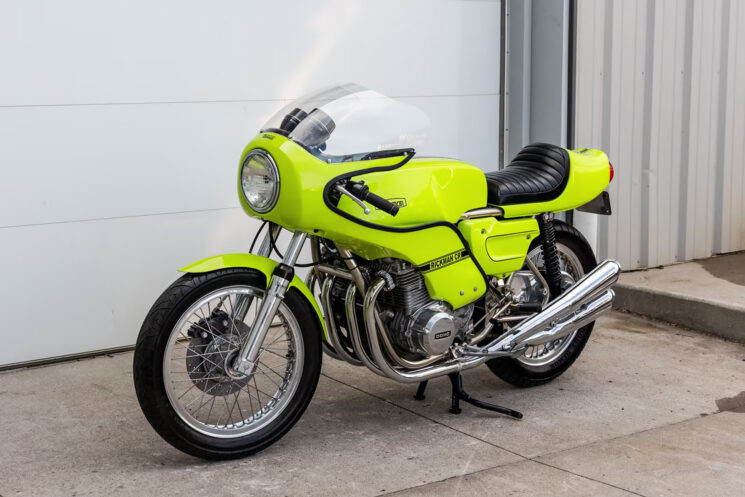
An old saying in aviation says ‘If it looks right, it flies right,’ summarizing the idea that the most ideal mechanical designs are often the most visually pleasing. While beauty is decidedly in the eye of the beholder, there’s no debating the Rickman brothers’ performance chops, and not a single item out-of-place on this exceptional 1974 Rickman Kawasaki CR900.
1974 Rickman CR900
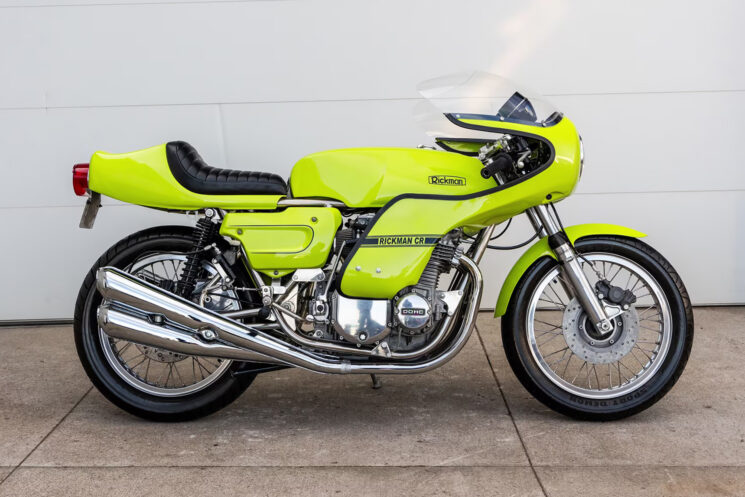
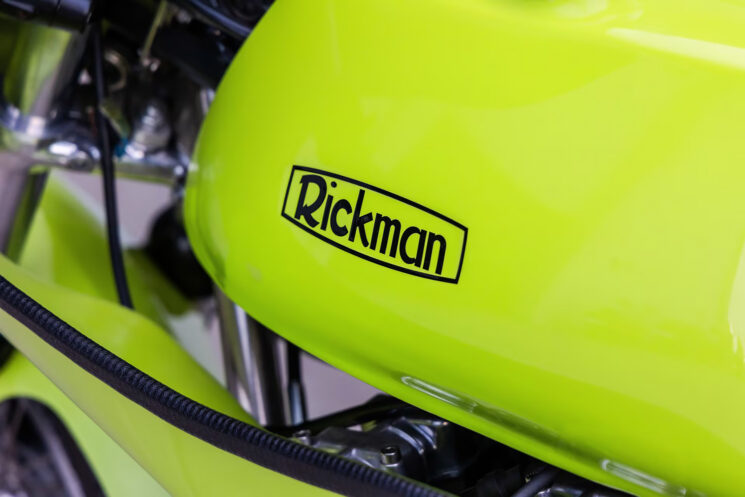
In viewing Lot F171 of Mecum’s upcoming Las Vegas 2025 sale, the impact of the retina-searing safety yellow (or green?) paintwork is undeniable. It’s a bold color that feels like it’s just come back into fashion, but it’s correct for the bike and I’ll go out on my first limb of the new year by saying I fucking love it. Boasting an impeccable restoration and all the design savviness that made Rickman famous, this CR900 makes our shortlist from Mecum’s big sale.

The masterminds behind the marque are Derek and Don Rickman, initially competitive motocross racers, who recognized the need for better chassis performance to handle the rigors of off-road competition. The Rickman brothers went into business in England sometime in the late 1950s, and it didn’t take them long to forge a reputation for exceptional craftsmanship.
1974 Rickman CR900
Superior lightweight design, improved geometry and Reynolds 531 tubing were the defining characteristics of a Rickman chassis. This branded manganese–molybdenum, medium-carbon steel had become a benchmark for the finest fabrication of the time, used in automotive, aeronautical and (most notably) bicycle frame applications. Rickman’s handbuilt frames, combined with off-the-shelf engines, revolutionized off-road racing by offering superior handling, rigidity and weight savings.

The success of their motocross frames led to the development of road-going and track-focused chassis, and by the 1960s, Rickman Motorcycles had become synonymous with high-performance custom builds. Their ‘Metisse’ (French for ‘mongrel’) frames gained worldwide acclaim, particularly when paired with engines from Triumph, BSA and Matchless.
1974 Rickman CR900
By this time, Rickman had become a legitimate manufacturer and expanded its offerings to include fully faired café racers and street bikes, often outfitted with Japanese powerplants from brands like Honda and Kawasaki during the 1970s. This transition capitalized on the handling faults of popular high-powered Japanese models, and the company continued to refine their signature handmade frames, fiberglass bodywork and innovative design elements like integral oil-in-frame systems.
1974 Rickman CR900
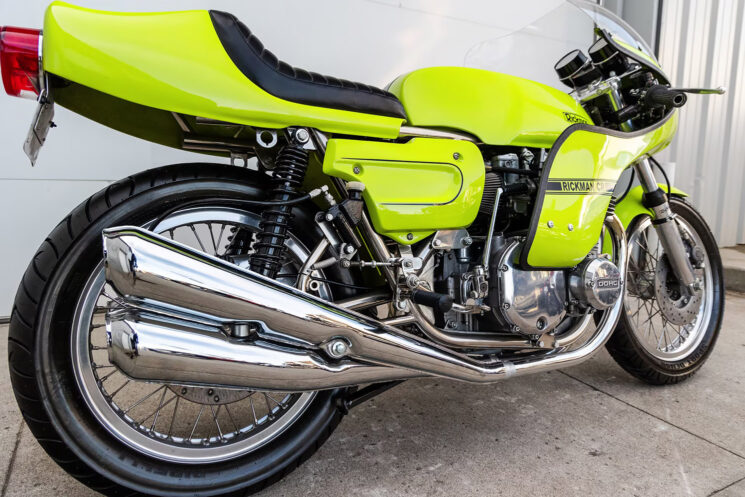
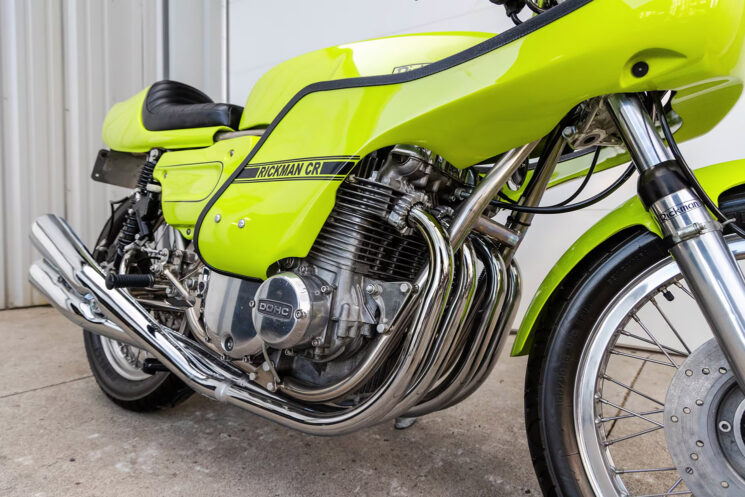
It takes no more than a passing glance at this Kawasaki Z1-based Rickman CR900 to see the design and manufacturing excellence that earned Derek and Don Rickman their place in the A.M.A. Motorcycle Hall of Fame. The hand-built Reynolds 531 frame has purposeful performance geometry, with every tab, bracket and linkage being no heavier or more complicated than need be. It’s simple and elegant, with a thick nickel-plated finish to top it all off.
1974 Rickman CR900
Rickman went to such lengths with the chassis to tame one of the most wiley beasts of the day, the 903 cc DOHC four-cylinder sourced from the Kawasaki Z1. Developed to topple Honda’s CB750 and establish Kawasaki as the king of motorcycles, the Z1 offered staggering performance to the tune of 82 hp at 8,500 rpm.

The Z1’s performance did indeed set the world ablaze, but like many of its contemporaries, the Z1 had a nasty habit of wiggling like a worm when you got off the throttle, and the engine could easily outrun its single front disc and rear drum. Rickman’s progressive dual-shock swingarm and Lockheed discs were a quantum leap forward, laced to Borrani aluminum wheels with CAD-plated 10-inch rotors.
1974 Rickman CR900
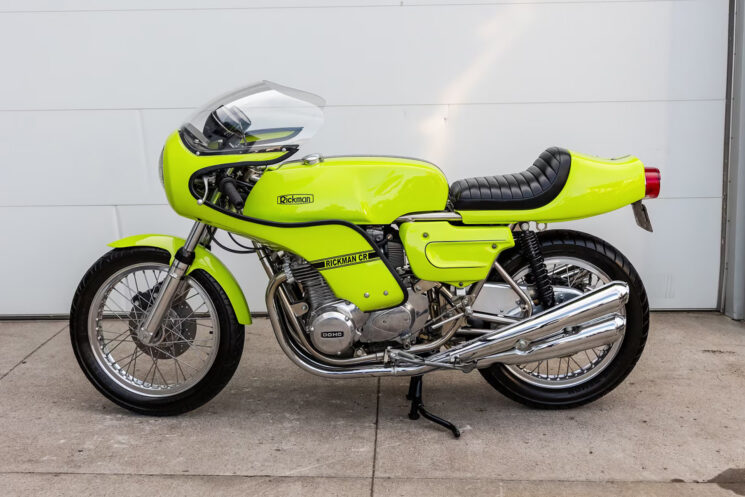
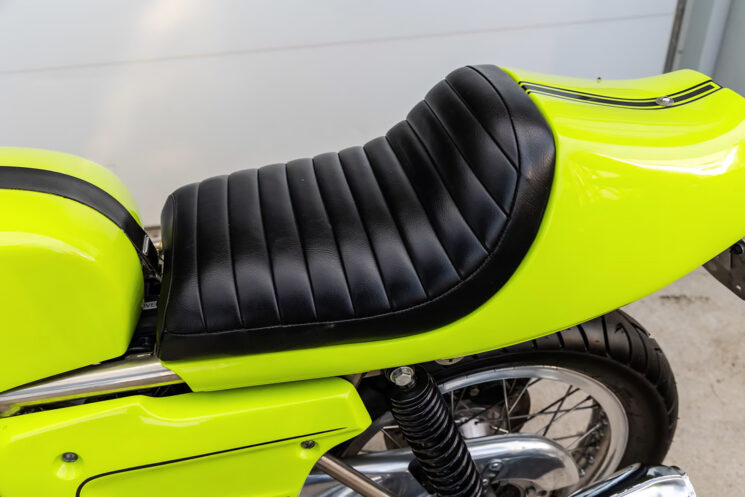
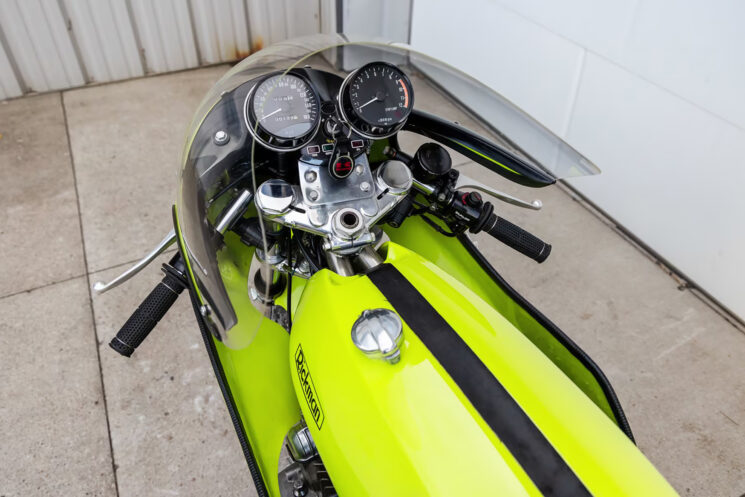
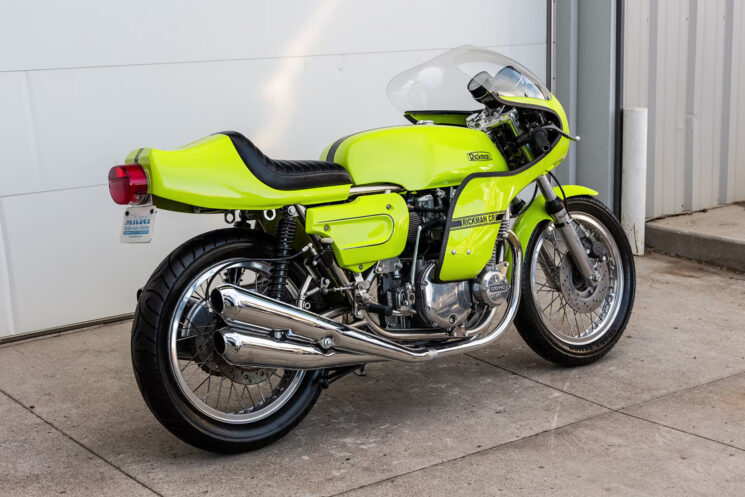
To compete with the fit and finish of the big manufacturers, Rickman outfitted the CR900 with a full suite of fiberglass bodywork, including a full CR fairing, Daytona-style tail section and Grand-Prix tank and side covers—these being exceptionally rare items to source today. Graced with a screaming safety yellow finish with black stripes, the CR900 was unlike any bike available in 1974 and Rickman produced just 146 examples that year.
1974 Rickman CR900
Discovered in Florida and comprehensively restored in the early 2000s, you’ll find few nicer examples of the Z1-based ’74 CR900 than Lot F171. While its replacement engine may hold the value down some, there’s simply nothing to scoff at upon a close inspection, and the bike has clearly been well cared for. Its fair value is probably between $25,000 and $30,000, but hey, it’s a no-reserve sale and could be your lucky day. Lot F171 crosses the block on Friday, January 31.
1974 Rickman CR900

Source: Mecum


from Bike EXIF https://ift.tt/BfAx4dr

Tuesday, 7 January 2025

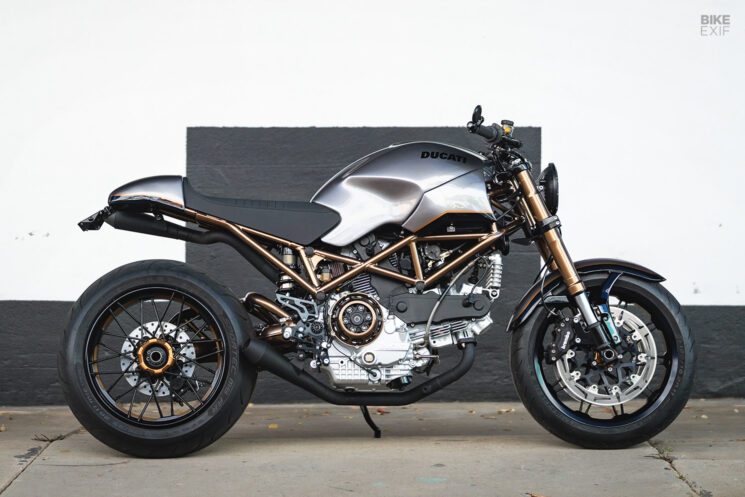
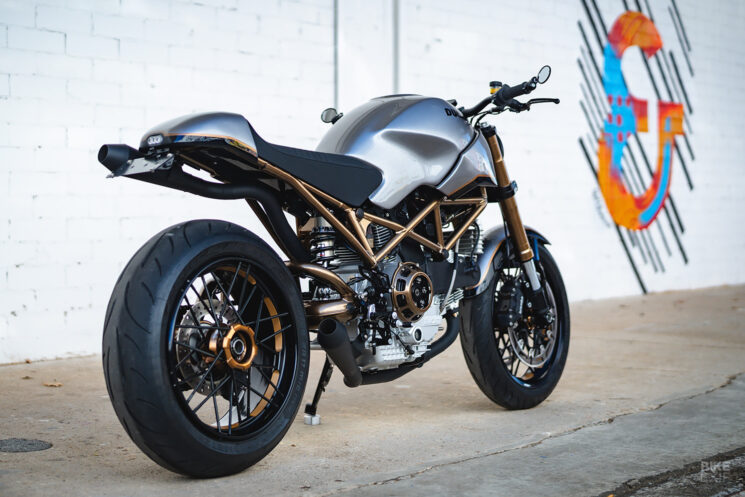
Monstrous Style: A fine-tuned Ducati Monster S2R 1000 by Analog
Ducati Monster S2R 1000 restomod by Analog Motorcycles
Like a connoisseur of fine wine, art, or vintage vinyl, every Ducati Monster enthusiast has an era they swear by. For Tony Prust at Analog Motorcycles, it’s the mid-2000s—specifically, the Ducati Monster S2R 1000.

“I cut my teeth customizing my own 2007 Ducati Monster S2R 1000, back when I started getting into motorcycle customization,” Tony tells us. “I tailored bits and pieces like belt covers, lowered the dash and headlight, and actually sold some of those modifications to other Monster owners. That bike was also the first one I fully took apart to powder-coat loads of parts.”

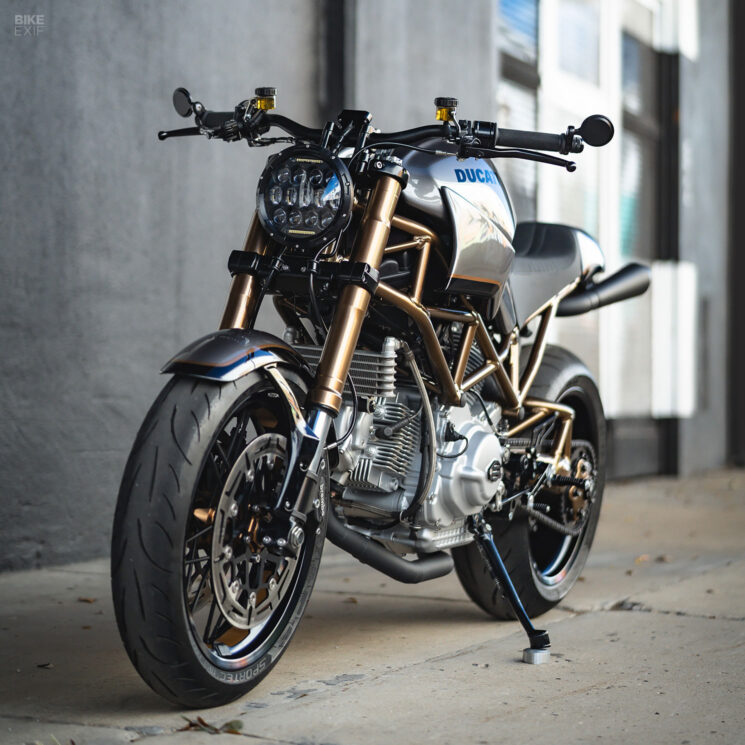
Ducati Monster S2R 1000 restomod by Analog Motorcycles
Tony’s love affair with the Ducati Monster S2R 1000 came full circle when a client asked him to build the ultimate air-cooled Monster. “He has a couple of modern bikes, but wanted something simple to rip around town on,” says Tony. “The air-cooled models certainly help to keep things simple, both aesthetically and mechanically.”

A low-mileage Monster S2R 1000 was sourced for the project. The client had two specific requests; he wanted to retain the stock fuel tank, and he wanted a swish set of custom wheels on the bike. Everything else was up to Tony.

Ducati Monster S2R 1000 restomod by Analog Motorcycles
“He was willing to let me have creative freedom to tailor it how I would if it were mine,” he tells us. “Since I prefer to build riders, I built it as if I planned to ride it a lot; upright handlebars, some room in the seat to get comfortable, and all the things you would need to make it a daily rider if desired.”

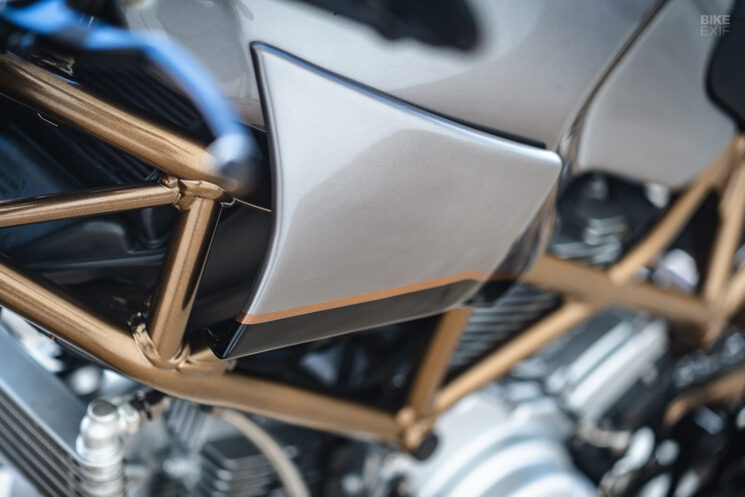
Tony’s first task was to add some flair to the Monster’s fuel tank without ruining its classic lines. He fabricated a pair of small tank fairings that not only look great, but also direct air to the rear cylinder.

Ducati Monster S2R 1000 restomod by Analog Motorcycles
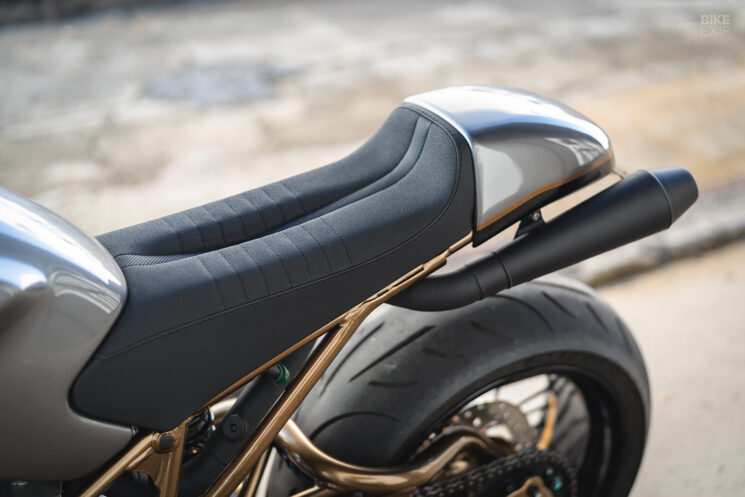
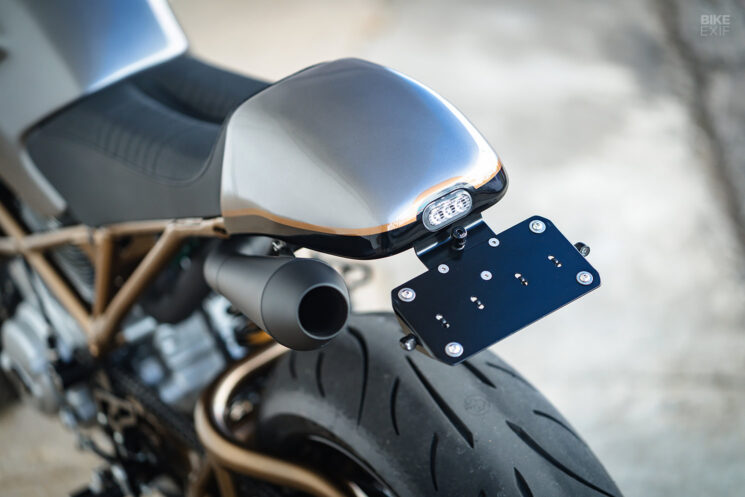
Next, the subframe was modified and the iconic Ducati trellis frame was de-tabbed. A new seat pan and rear hump were fabricated, before regular Analog co-conspirator, Dane Utech at Plzbeseated, topped it off with elegant upholstery. The Monster’s new bodywork is different enough to set it apart from the stock bike, but not so outlandish that it ruins the S2R’s classic appeal.

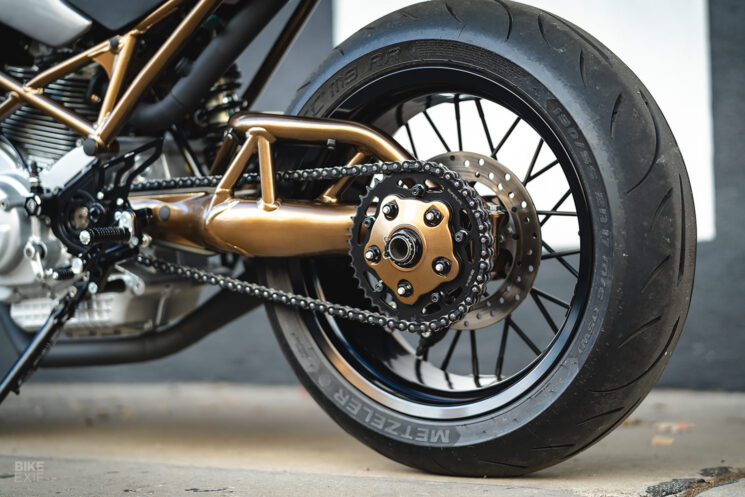
Moving to the chassis, Tony added new fork cartridges and an upgraded rear shock, both from Matris Dampers. As per the client’s request, a gorgeous set of spoked wheels was ordered from Jonich Wheels in Italy, specced with black and bronze finishes.

Ducati Monster S2R 1000 restomod by Analog Motorcycles
The plan was to carry the same color scheme through to the rest of the Monster—but since the wheels were being custom-built, Analog had to be patient. Luckily Jonich sent over a set of paint samples, so that the team could tackle the rest of the finishes with zero guesswork.

The frame, forks, swingarm, and a handful of other bits, were all sent to Southern Powdercoating for a bronze chrome finish. Krossover Customs laid down a tasteful silver, black, and bronze livery over the bodywork. The remaining parts were done in black—save for the engine, which was repainted in the original silver hue by Apex Cycles.

Ducati Monster S2R 1000 restomod by Analog Motorcycles
With 95 horsepower from the Monster’s 992 cc motor, there was little need for internal upgrades. Instead, Analog modified the air box, installed a K&N filter, and built a new exhaust system with Cone Engineering mufflers.

Ceramic coated in black by Loko Performance, the asymmetrical exhausts reportedly sound as rowdy as they look. “I always wear earplugs when I ride,” says Tony. “That may not be most people’s go-to, but I’d recommend it in this case.”

Ducati Monster S2R 1000 restomod by Analog Motorcycles
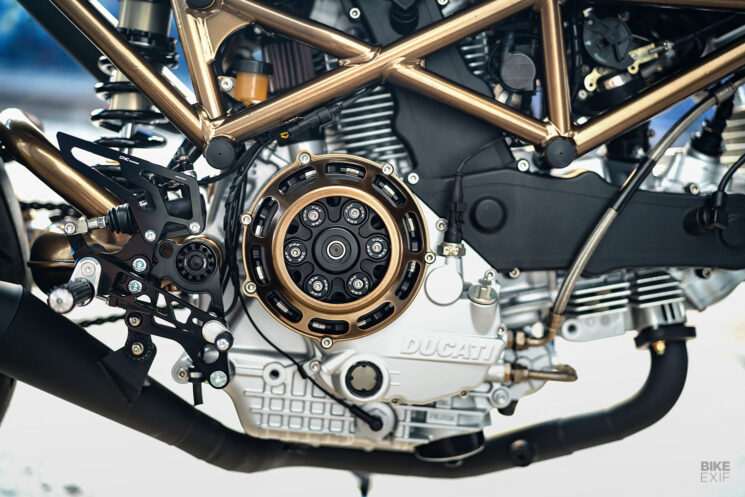
A Microtech ECU was added next, before the bike went off to Mark Sutton (formerly of Ducshop) for a tune. The Monster also employs a Ducabike six-spring slipper clutch and slave cylinder, with a billet aluminum clutch cover from TPO. Going deeper, Analog built an all-new wiring loom around a Motogadget control box.

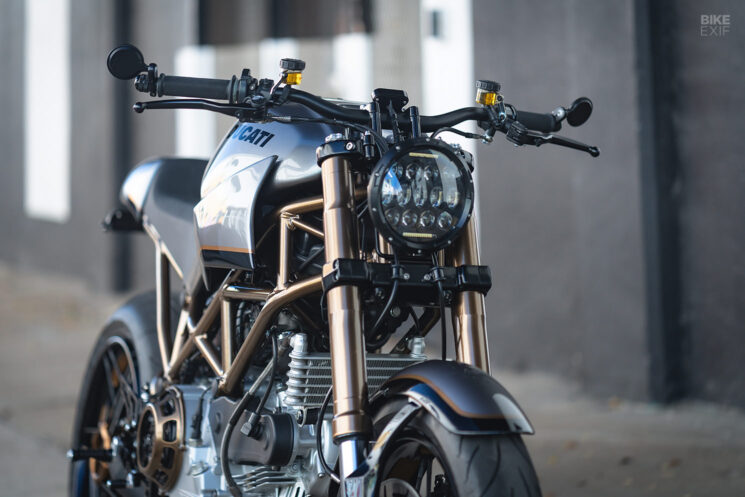
The cockpit features Rizoma handlebars, Magura controls, Motogadget switches, and Vortex grips. A tiny Motogadget speedo sits atop the upper bar clamp, complete with a row of LED idiot lights. CRG bar-end mirrors round out the package.

Ducati Monster S2R 1000 restomod by Analog Motorcycles
For lighting, Tony picked an LED headlight from Speed Moto Co. and mounted it on custom-made brackets. The front turn signals are from Analog’s in-house brand, Analog Motor Goods, while the rear units are from Highsider. A Denali LED taillight is neatly embedded into the back of the tail bump.

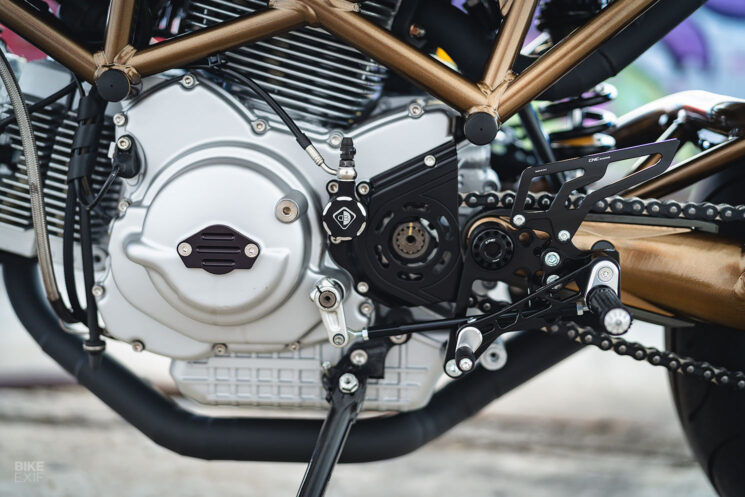
Finishing touches include a Vortex fuel cap, Spiegler brake hoses, and CNC Racing rear-set foot controls.

Ducati Monster S2R 1000 restomod by Analog Motorcycles
Tony has a gift for balancing form and function, and he’s used it to great effect with this Monster restomod, by amplifying both its timeless style and its rideability. “It’s a super fun bike to ride and rip around back roads on,” he adds. “It has a ton of torque—like a properly tuned Monster should.”

Analog Motorcycles | Facebook | Instagram | Images by Steve West

Ducati Monster S2R 1000 restomod by Analog Motorcycles


from Bike EXIF https://ift.tt/J6zg5wf

Monday, 6 January 2025

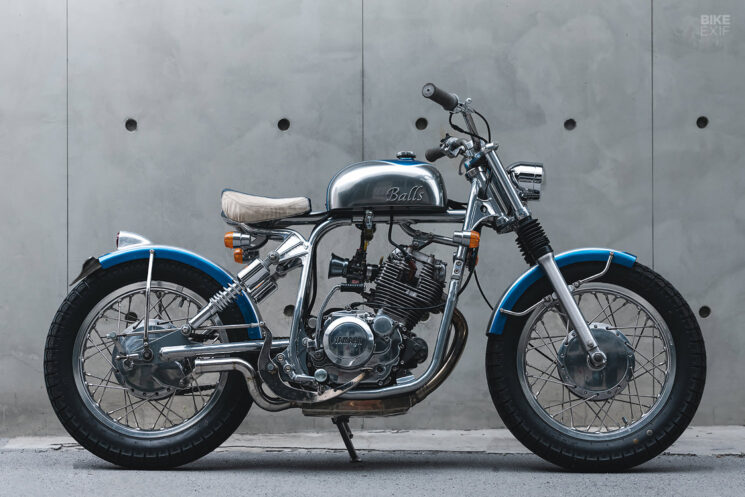
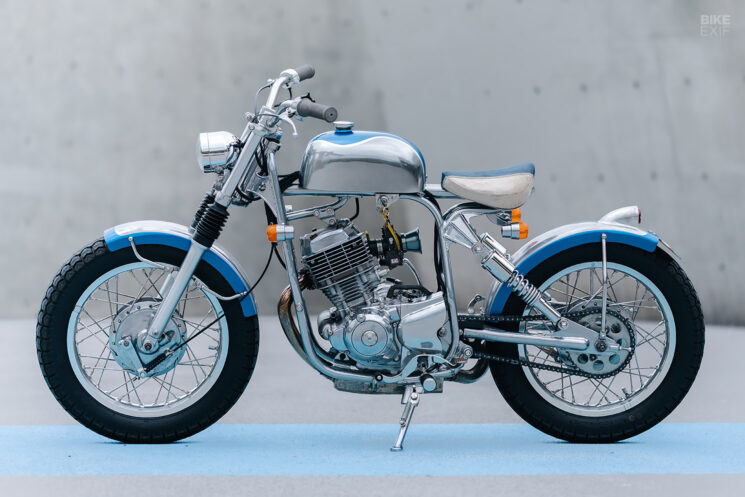
Baby Blue Whale: A quirky Yamaha SR150 bobber from Taiwan

Custom built Yamaha SR150 bobber by Balls Custom, Taiwan
The Yamaha SR150 is Taiwan’s best-kept secret. Exclusively manufactured and sold locally, the cheap and cheerful single sold in droves in its heyday, mostly to commuters and delivery riders. It’s no longer in production—but it’s found new life in the custom scene.

We’ve seen slick custom SR150s from workshops like Hide Work Custom, TwentyTwo Custom, and Twist.Co. But this plucky Yamaha SR150 bobber comes from an outfit that’s new to these pages; Balls Custom.

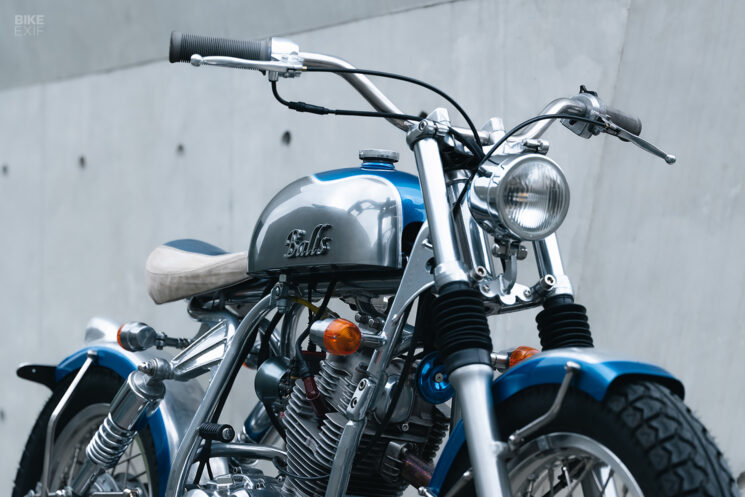
Custom built Yamaha SR150 bobber by Balls Custom, Taiwan
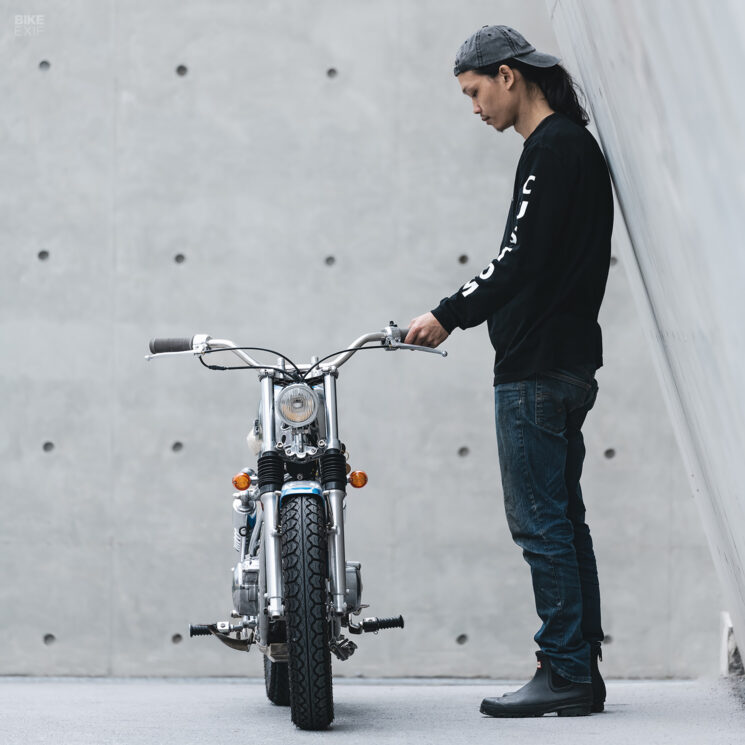
Based in New Taipei City, the cheekily-named Balls Custom shop is part workshop, part cafĂ©. They were tasked with customizing the Yamaha SR150 by a female rider who wanted something small and manageable to scoot around on. Visual inspiration for the build came from an unlikely source—the vintage BMW R50.

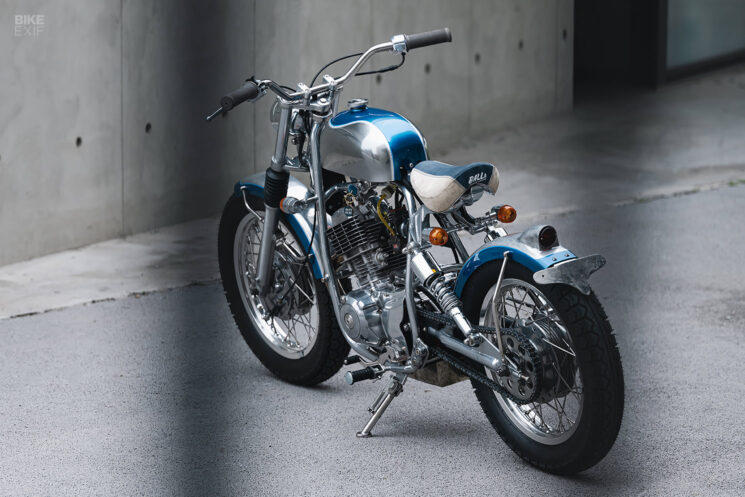
The SR150 and R50 are worlds apart, so Balls wasn’t looking to copy every aspect of the classic boxer’s design. The idea was to take key elements from the R50 and reinterpret them for the newer Yamaha. A compact fuel tank, bobbed seat, and low-mounted rear fender were all on the list.

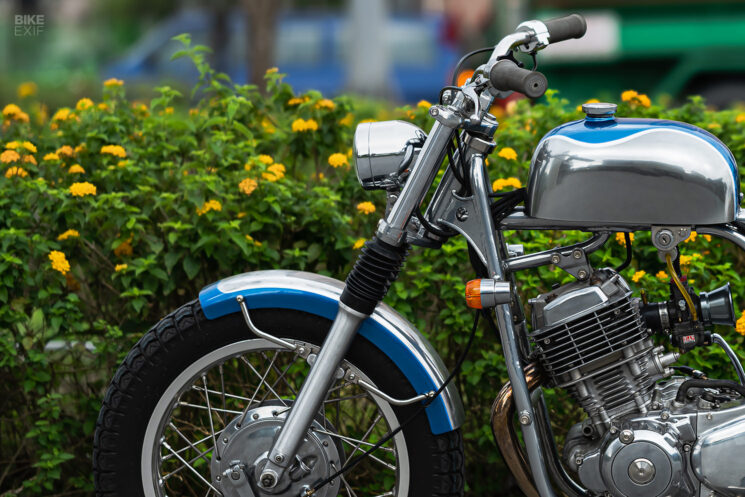
Custom built Yamaha SR150 bobber by Balls Custom, Taiwan
Before they tackled the bodywork, Balls tore the Yamaha SR150 down to its nuts and bolts and began massaging the frame. The pint-sized runabout needed a lot more than a subframe chop to bring it in line with the team’s vision though. Balls ended up welding in a thicker frame backbone, fettling the steering neck, and redesigning the rear end with new shock mounts.

Next, the guys modified the swingarm and installed a pair of chromed rear shocks. The wheels were swapped out for 16” items, built with aluminum hoops and the OEM drum brake hubs. They’re wrapped in matching 3.5-inch-wide Kenda K489 tires.

Custom built Yamaha SR150 bobber by Balls Custom, Taiwan
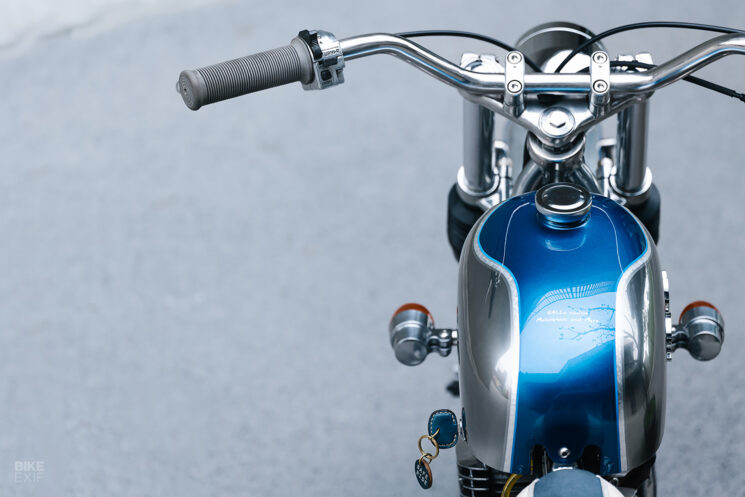
Next, Balls fabricated an adorable fuel tank to sit atop the tweaked frame, topped off with a chromed filler cap. A kangaroo and pig leather saddle sits just behind it.

Handmade fenders and brackets sit at either end of the bike, with a classic taillight mounted in an integrated housing on the rear fender. The headlight mount is a custom piece too, as are the brackets that hold the Yamaha’s vintage-style turn signals.

Custom built Yamaha SR150 bobber by Balls Custom, Taiwan
Balls kitted the cockpit with a set of stainless steel handlebars, fitted with the bare minimum controls and switches. The ignition’s been relocated to a custom bracket just below the fuel tank, on the left side of the bike. The brake pedal and gear shifter are custom stainless steel bits.

Looking to squeeze a little more juice out of the baby SR, the crew cracked open the motor and bumped it up to 226 cubic centimeters. It’s fed by a Yoshimura carb and a velocity stack, and exhales via a custom-made stainless steel exhaust system.

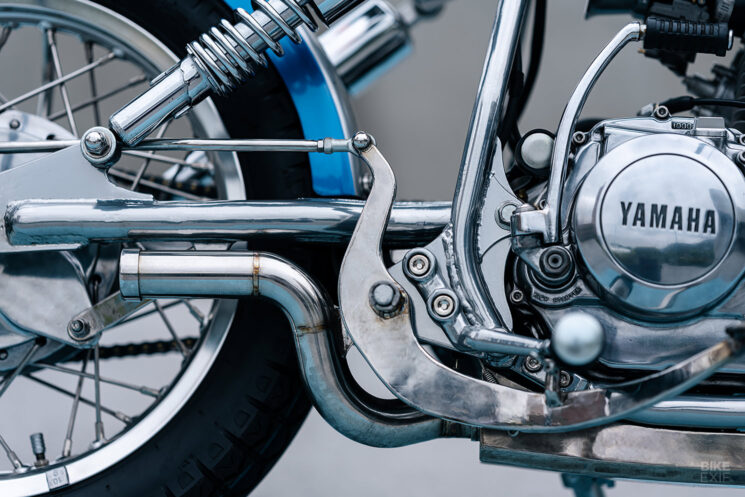
Custom built Yamaha SR150 bobber by Balls Custom, Taiwan
The crew wanted to keep the SR150’s new exhaust as unobtrusive as possible, so they built a boxy muffler underneath the bike that gently matches the curve of the frame’s lower rails. From there, a short curved section directs gasses upward and out, mimicking the look of an open system.

Other subtle custom touches include a neat aluminum front sprocket cover and a hidden box that holds a Lithium-ion battery.

Custom built Yamaha SR150 bobber by Balls Custom, Taiwan
The Yamaha SR150’s silver frame and fuel tank sport an electroplated silver finish that’s almost as brilliant as chrome, but with a more satin-like finish. Conversely, the silver bits on the fenders are polished aluminum, to show off Balls’ handiwork. Line and Circle Custom Studio added the blue paint and silver leaf striping, tying the whole thing together stylishly.

Quirky, yet handsome in its own special way, Balls Custom’s Yamaha SR150 bobber is the perfect cure for the Monday blues—and a great reminder that the littlest SR has miles of potential.

Balls Custom Instagram | Images by Amos Wang and Weeber Photography

Custom built Yamaha SR150 bobber by Balls Custom, Taiwan


from Bike EXIF https://ift.tt/5olcbiU

Saturday, 4 January 2025

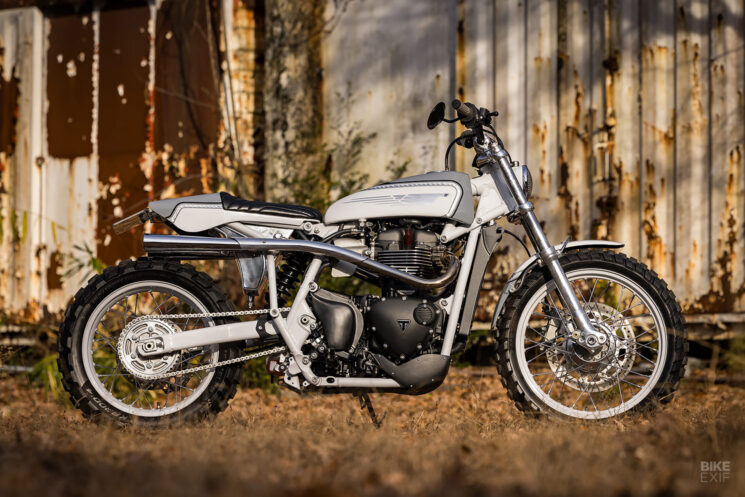
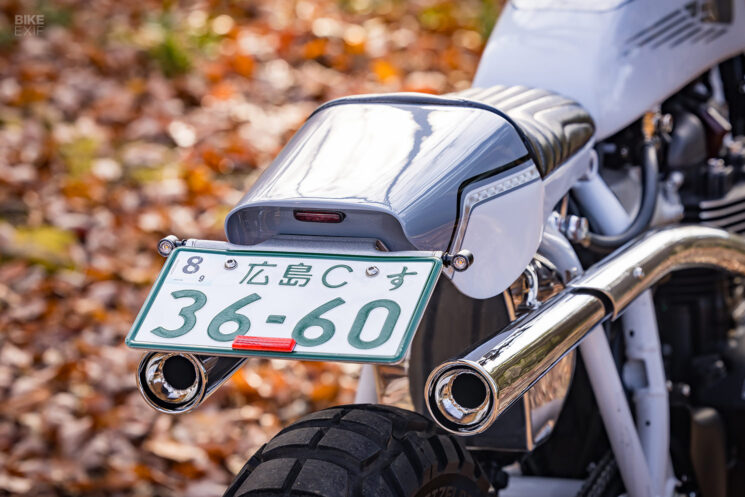
Fresh from Heiwa MC: A modern Triumph Scrambler 900 with retro style

Custom 2024 Triumph Scrambler 900 by Heiwa MC
Many custom bike builders develop a signature style over time—but that style is often attached to one particular make, model, or era of motorcycling. Then there are craftsmen who can apply their distinct art to any canvas, without compromise. Kengo Kimura of Heiwa MC is one such artisan.

Based in Hiroshima, Kimura-san is one of the leading lights in the Japanese custom scene. His custom bikes are recognizable for their elegant tapered silhouettes, and the way each part harmonizes with the next. Most of his projects use older models as donors, but he’s just as adept at modifying new bikes—as evidenced by this handsome 2024-model custom Triumph Scrambler 900.

Custom 2024 Triumph Scrambler 900 by Heiwa MC
What’s remarkable is how much Kengo’s been able to manipulate the modern Triumph to suit his vision. The British marque has done well to keep the Scrambler 900 looking rather tidy out of the box, but it still packs a hefty amount of electronic doohickies. There’s a lot to clean up—and one wrong move could turn the bike into a very stylish (and expensive) paperweight.

That hasn’t stopped Kengo though. Thanks to his deft handiwork, this neo-retro scrambler could easily pass for a vintage machine.

Custom 2024 Triumph Scrambler 900 by Heiwa MC
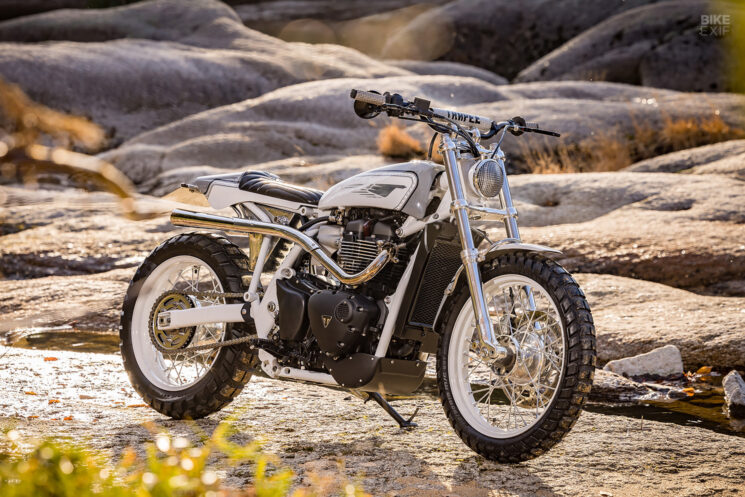
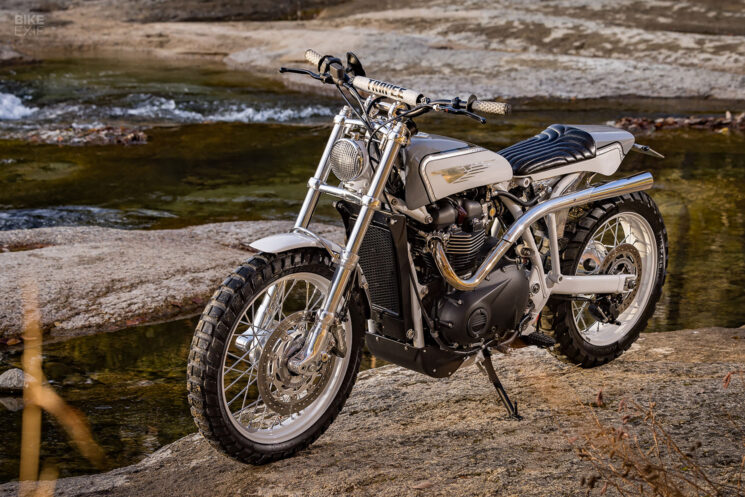
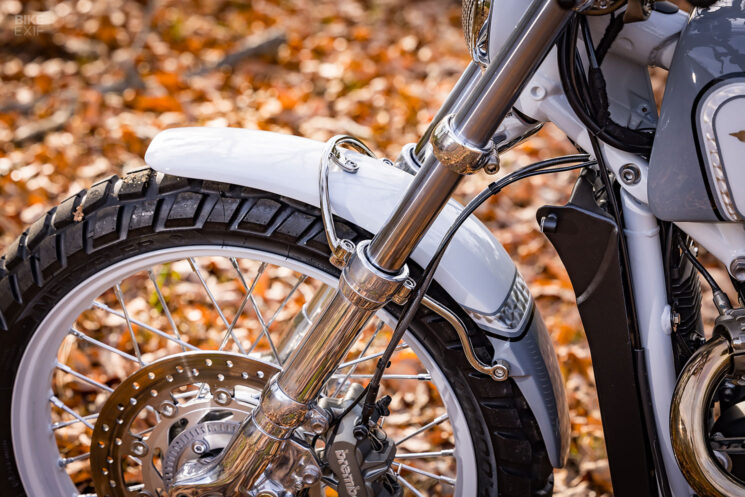
As you’d expect, there are a lot of handmade parts in play. Kengo removed all of the Triumph Scrambler 900’s bodywork, replacing it with custom aluminum pieces. The design starts with a generous front fender, mounted on hand-bent stays, before continuing through to a svelte fuel tank and a tracker-style tailpiece.

Kengo’s first big challenge was accommodating the Triumph’s bulky fuel pump in such a small space. To get around it, he instead housed the pump in a second aluminum reservoir, situated under the seat.

Custom 2024 Triumph Scrambler 900 by Heiwa MC
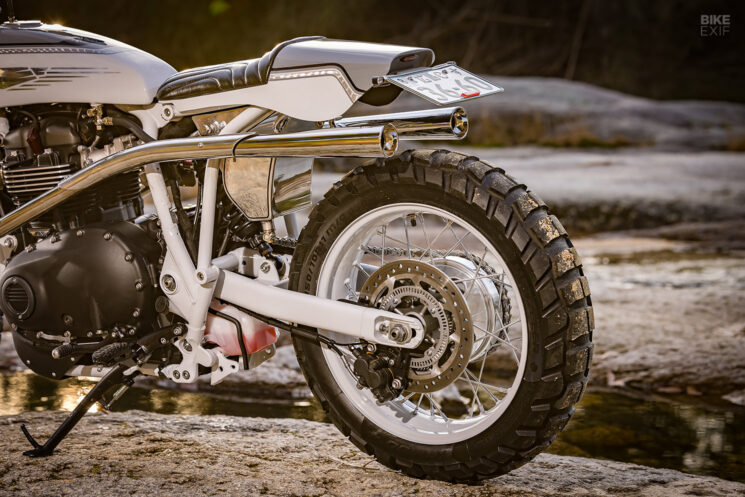
The lack of side covers puts more clever craftsmanship on display—starting with the Scrambler 900’s new bespoke subframe. Kengo hacked the original unit off, before welding mounting points to the main frame and fabricating a bolt-on section that looks better than factory.

Keen eyes will also notice the lack of Triumph’s traditional twin-rear-shock arrangement. Kengo lengthened the stock swingarm, shaved off its original shock mounts, and added a brace that doubles as the lower shock mount. An Ă–hlins shock connects the swingarm to a custom upper shock mount.

Custom 2024 Triumph Scrambler 900 by Heiwa MC
A set of rare Italian-made Forcelle forks do duty up front, held in place by custom-made aluminum yokes. A small headlight floats between the yokes, hung from a handmade brace that echoes the design of the front fender stays.

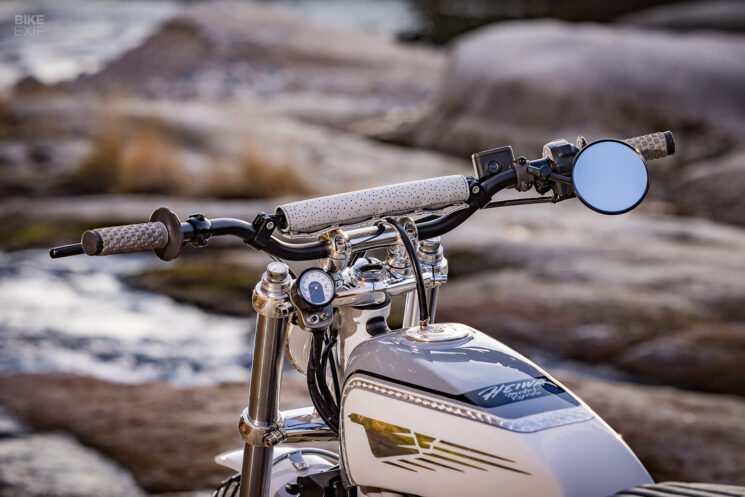
Cross-braced Renthal handlebars sit further back, fitted with ProTaper dirt bike grips. Kengo has somehow managed to navigate around the modern Triumph Scrambler’s can BUS system, reducing the dashboard to a small Motogadget speedo with a pair of basic switches.

Custom 2024 Triumph Scrambler 900 by Heiwa MC
A slim LED taillight, and discreet LED turn signals, round out the lighting package. Kengo also fabricated a new sump guard, sprocket cover, and radiator guard. (The latter includes a housing for the ignition barrel, situated low down on the left-hand side).

Heiwa’s Triumph is finished off in a bewitching light grey livery from Shakin’ Speedgraphix, complete with dark grey accents and silver leaf striping. The upholstery comes courtesy of Ya.Seat.Custom in Bangkok, and the marvelous twin exhausts are Kengo’s doing.

Custom 2024 Triumph Scrambler 900 by Heiwa MC
If you’ve been aboard a Triumph Scrambler 900, you’ll know that it’s fairly compact in stock form. But Kengo’s managed to make it look even skinnier, and a heck of a lot classier.

As we’ve come to expect from Heiwa, there’s not a single thing we’d change—other than the name on the title.

Heiwa MC | Facebook | Instagram | Images by Kazuo Matsumoto

Custom 2024 Triumph Scrambler 900 by Heiwa MC


from Bike EXIF https://ift.tt/m4f06oQ

Thursday, 2 January 2025

How To Remove OEM Battery Vent Tube Audi – Full Step by Step

Are you ready for a full step by step guide on how to remove the OEM battery vent tube of your Audi? As Audi lovers, we appreciate the moments when we can tinker with our cars and get some grease on our hands. Audi is a brand of premium cars that appears to be complicated; it has advanced technology; hence, it may have features that require heightened skills when it comes to repair or modification. Of these, the OEM battery vent tube is one such feature that is rather an important part of all the trappings of an Audi car battery for safety and performance.

This article gives a detailed guide on how to go about this process with the OEM battery vent tube, and we give it in steps together with our own opinions to help you get a broader understanding. For your ease, we have included a section with Frequently Asked Questions as well, so you can approach your tasks both confidently and effectively.

Step 1: Gather Tools and Materials

Gather Tools and Materials

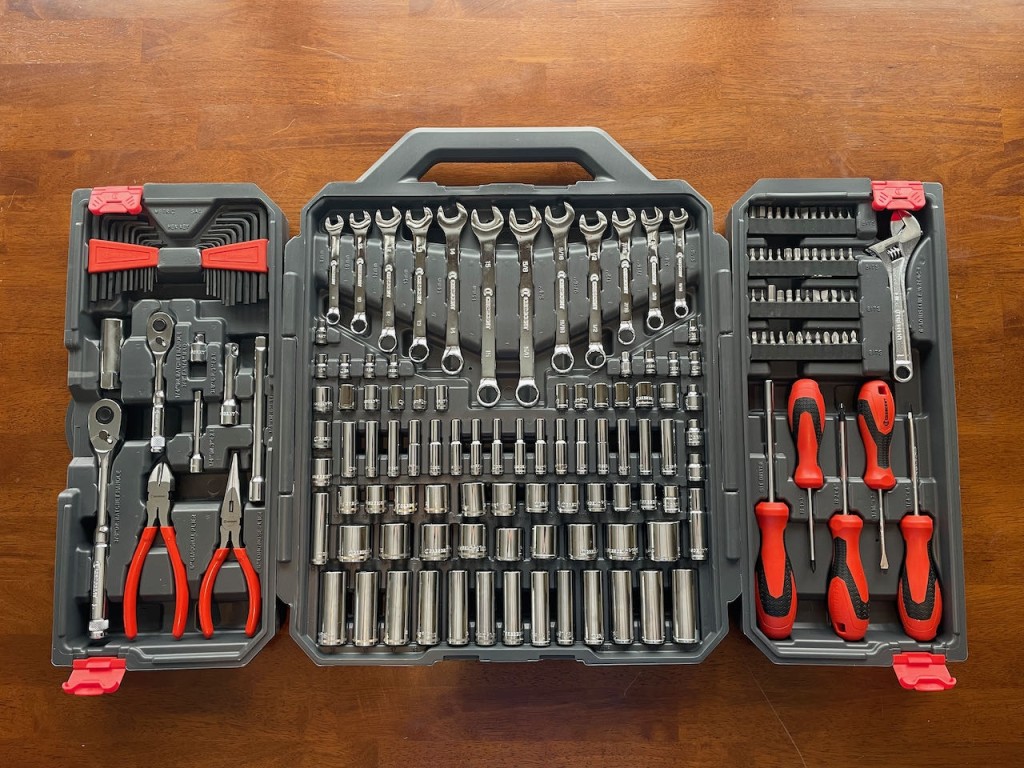
Whenever you are preparing to remove the carpet, ensure that you have some items with you. The main condition here stays in possessing a set of exclusively Audi-specific tools and a bit of time. In this case, you will need:

  1. A standard set of Allen wrenches which include 2, 2.5, 3, 4, and 5mm
  2. A T25 Torx driver
  3. An electrical connector crimping tool (optional)
  4. An electric battery isolation kit (optional)
  5. Hand gloves and protective eyewear
  6. Small bowl where all the small screws and remnants of rubber can be placed after usage
  7. wrench or socket set as one end open

Step 2: Discovery of the Battery Compartment

Most Audis contain the battery within the trunk area behind a carpet located on the left-hand side of the car. It’s typically simple to get at, and the battery in question is sheltered by a metal grid.

Step 3: Disconnect Battery

removing the positive (red) cable of your Battery
Removing the positive (red) cable of your Audi’s battery

Begin with the removal of the negative (black) cable because of safety precautions before finally removing the positive (red) cable. By using the wrench, you can remove the terminal bolts and then unclasp the cable away from the terminal post. Make sure you wipe the terminals while you have them disconnected so that you provide a good connection when you reconnect the battery.

Step 4: Locate the OEM Battery Vent Tube

How To Remove OEM Battery Vent Tube Audi Full Step by Step.jpg
OEM Battery Vent Tube Audi

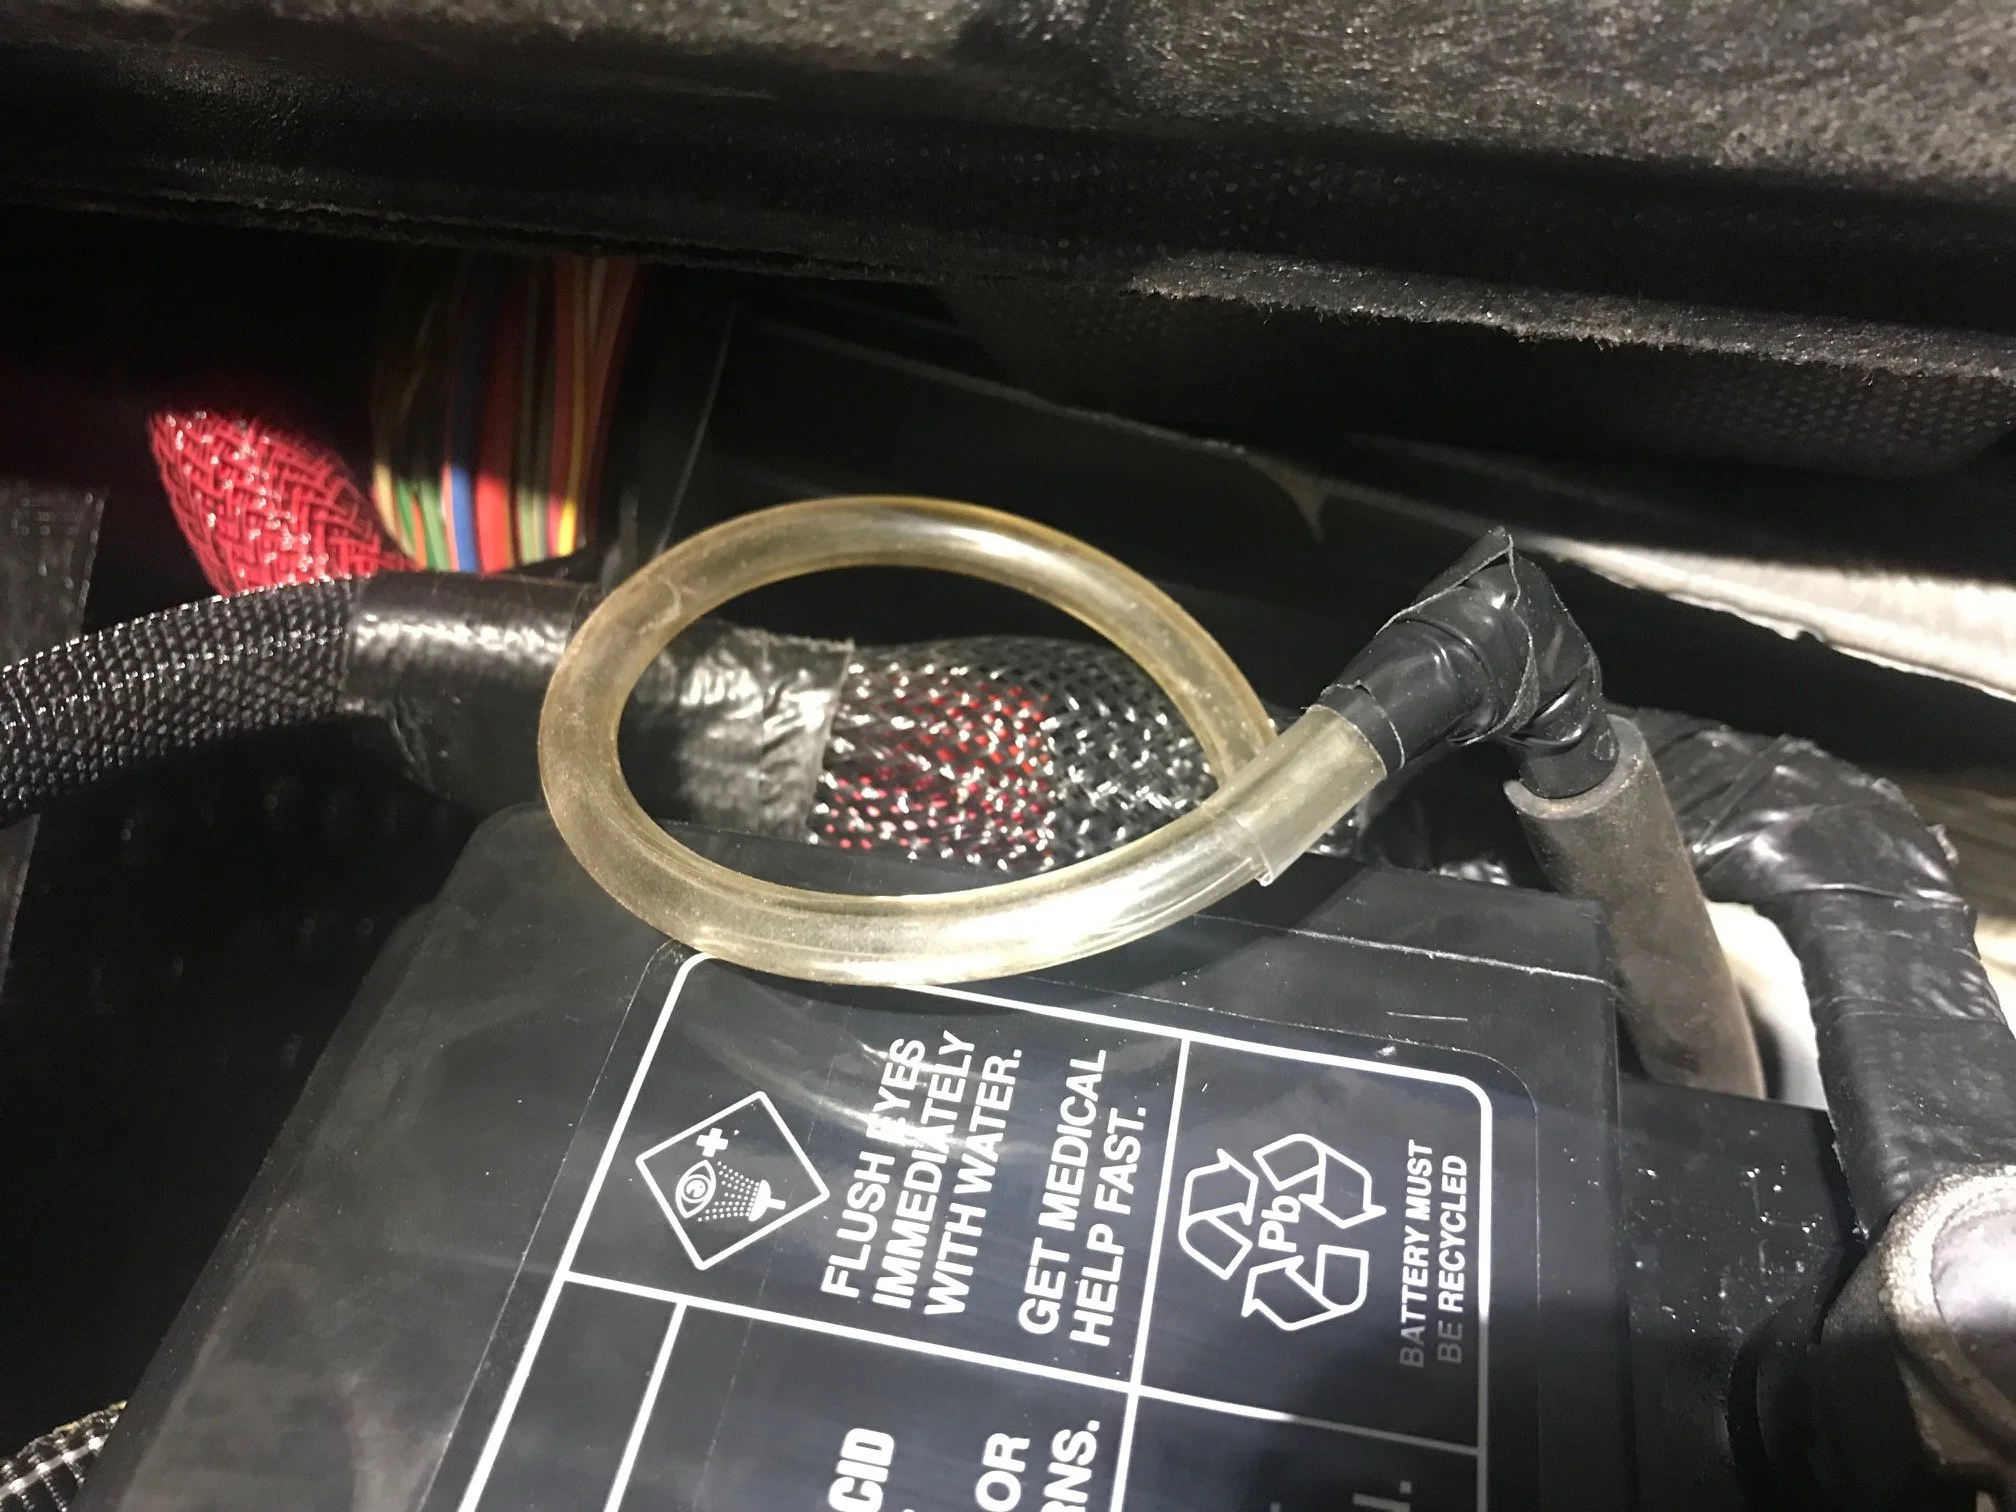
The OEM battery vent tube is built to let out the trapped gasses while also protecting the battery and other parts from harm. It is a small short rubber hose connected to the battery vent and till outside the car. In the battery compartment you will need to locate this tube and analyze its location and connections very closely.

Step 5: Remove the OEM Battery Vent Tube

With the T25 Torx driver, use that to retract the torx screws that hold the battery vent port. When the screws have been detached, the port is thus easily pulled in a direction that reveals the connection point of the vent tube. Carefully remove the tube from the port and unscrew the connector from the other end although sometimes it may be held in place by a small metal clip. You may need your crimping tool or an electrical tape to make sure everything is sealed well and there will be no short circuit.

Step 6: Verify if Something Causes Damage to the Battery Compartment

Scatter the parts briefly inside the battery compartment to see if there is any lingering rubber or material that might affect the battery’s performance or safety. If you come across any, just clean them up and ensure that all belongs to where it is suppose to be.

Step 7: Screw the Bolt of the Battery Vent Port

Now you can reinstall the battery vent port back in its place in place of the missing part using the torx screws which were pulled out. Check that all is well sealed so as to allow the gas to leave as it frees itself.

Step 8: Final Testing

Once the battery compartment has been reassembled, reconnect the battery terminals and then check everything is working as it should do. Turn it on and leave the engine running for some time to check on the vent tube and to ensure the engine is not leaking.

Frequently Asked Questions (FAQ)

Q: Why should the OEM battery vent tube be removed?

A: The initial aim of taking out the OEM battery vent tube is to avoid any kind of leakage or any kind of damage to the battery. Some enthusiasts may also wish to replace a stock or factory battery vent with a higher capacity or a more visually appealing unit.

Q: What if I don’t have a T25 Torx driver in my possession?

A: T25 Torx drivers can be purchased wherever car tools are sold or at any hardware store or auto parts store. If you don’t get one with the package, then try searching for a universal torx set because most of them come with different sizes.

Q: Is it possible to take out the OEM battery vent tube without having to take out the battery as well?

A: It is not recommended. This means you will avoid electrical shocks while servicing the battery section by removing the battery connection.

Q: What are the implications of having or removing the OEM battery vent tube?

Actually, the process is quite safe, but any operation with car batteries or electric systems has some risks involved. Remember to follow all the right safety measures and wear protective gloves and goggles while operating.

Q: Can one vent tube be changed for another?

A: Yes, that is, you have an option to install an aftermarket vent tube or replace an existing one. The only thing that you need to consider is choosing the right tube that corresponds to the model of your Audi to ensure correct fitting and operation.

End Note

Therefore, it is easy to remove the OEM battery vent tube in your Audi because it is not as complicated as some other tasks. The steps illustrated in this article will guide you in the right direction toward achieving success on your first try. To reiterate here, safety should always come first, and if you have any problems or don’t feel comfortable, you should consult with a professional. Happy wrenching!


from Auto Blog | Latest Car News and Reviews, Trucks, Bikes, and Motorcycles https://ift.tt/EWIcsko

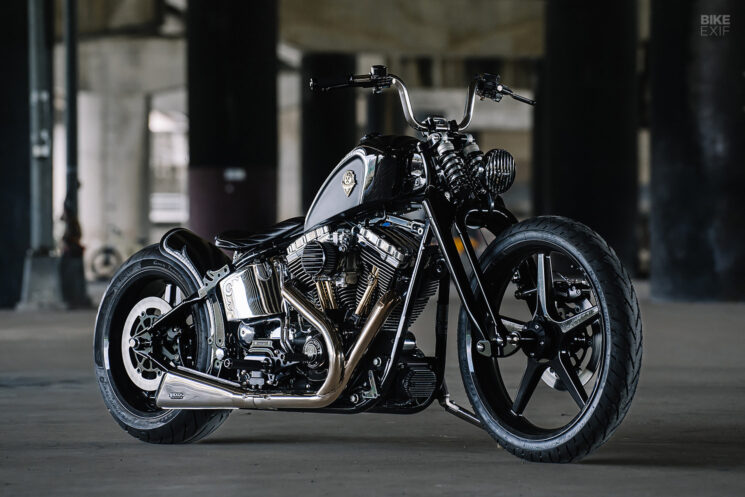
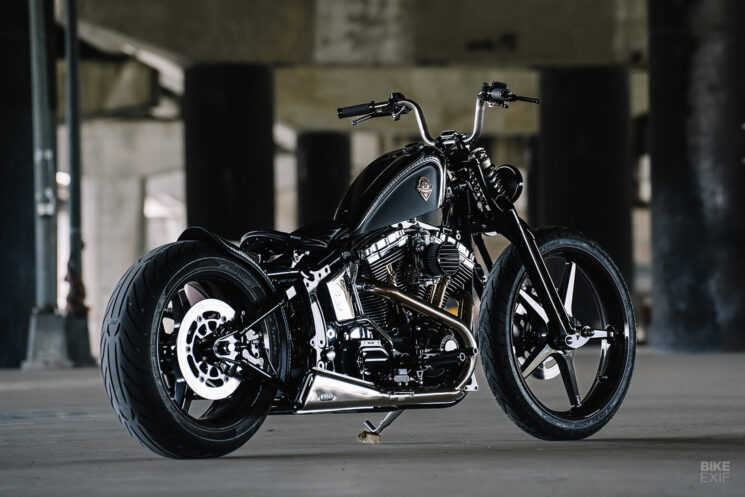
Imperium Talon: A skinny Harley Springer Softail by Rough Crafts

Custom Harley Springer Softail by Rough Crafts
Every five years, Harley-Davidson releases a fresh slew of special anniversary editions. They’re usually existing models, upgraded with fancy liveries and, in some cases, numbered plaques. But the fact that they come out twice a decade (and in strong numbers) sort of diminishes their allure.

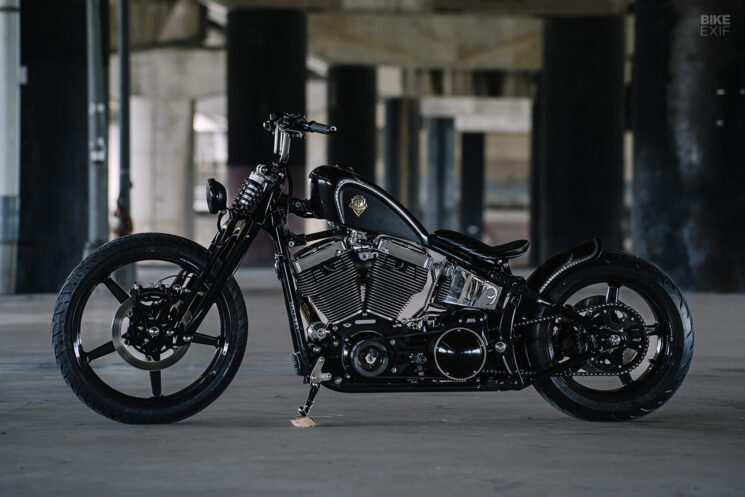
It’s little wonder, then, that the owner of this 100th Anniversary Harley Springer Softail had no qualms about handing it over to our man in Taiwan, Winston Yeh, for a Rough Crafts makeover.

Custom Harley Springer Softail by Rough Crafts
As implied, the 2003-model Harley-Davidson Springer Softail followed The Motor Co.’s typical Softail formula, with a vintage-style springer front end added to the mix. This particular example had already been dressed in a handful of aftermarket parts, so Winston’s client had no illusions about keeping it stock.

The brief was to turn it into a no-holds-barred Rough Crafts special, with one particular note. “He’s obviously into that old school vibe,” explains Winston, “so the one request he had was to keep it a ‘springer’ Softail.”

Custom Harley Springer Softail by Rough Crafts
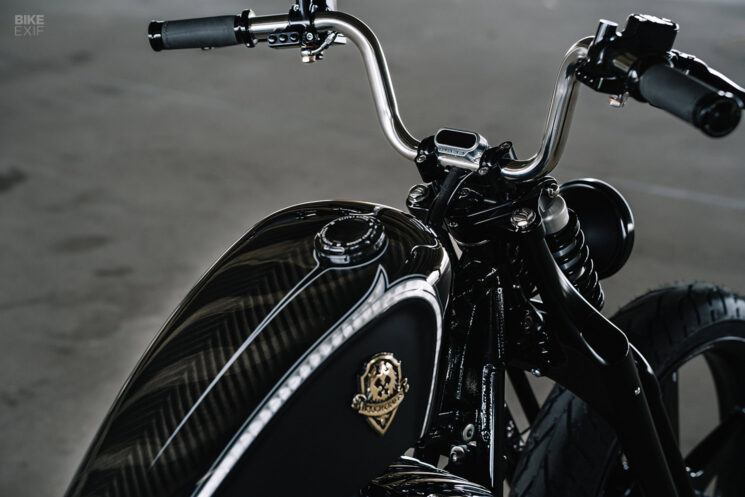
Winston sought to retain the vintage aesthetic of the front end—but improve its performance. So he ditched the OEM Harley springer fork in favor of a stunning billet aluminum setup from Rebuffini. The black-anodized fork utilizes a pair of Ă–hlins shocks.

Next, Winston specced the rest of the Harley’s running gear to perfect its stance. “I decided to go with that old school chopper vibe,” he tells us, “but, as usual, without changing the frame.”

Custom Harley Springer Softail by Rough Crafts
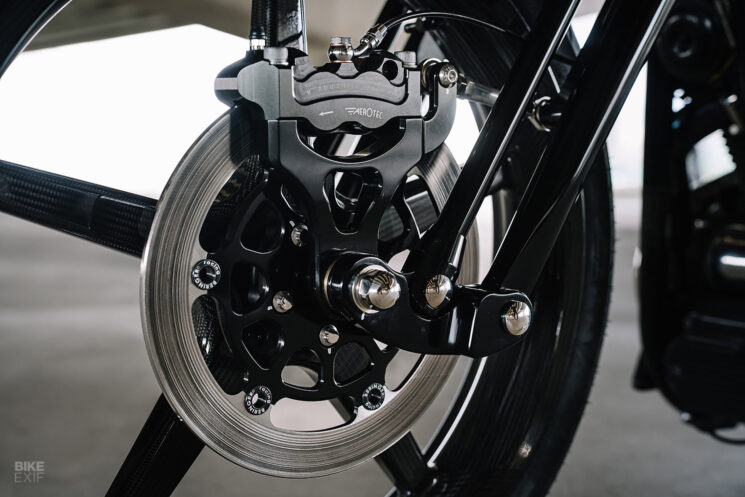
The Softail now rolls on carbon fiber wheels from BST, with a skinny 21” hoop up front and a less skinny 17” unit at the back. They’re wrapped in Pirelli rubber, with Rough Crafts-branded Beringer Aerotec brake calipers to slow them down. Rough Crafts brake carriers and Beringer discs complete the setup.

A Progressive Suspension shock is hooked up to the stock swingarm, improving the rear-end ride feel. The Softail not only looks perfectly balanced now, but it should perform a whole lot better too. The new components also go a long way to shedding visual weight, giving the machine a lithe appearance that’s echoed in its svelte bodywork.

Custom Harley Springer Softail by Rough Crafts
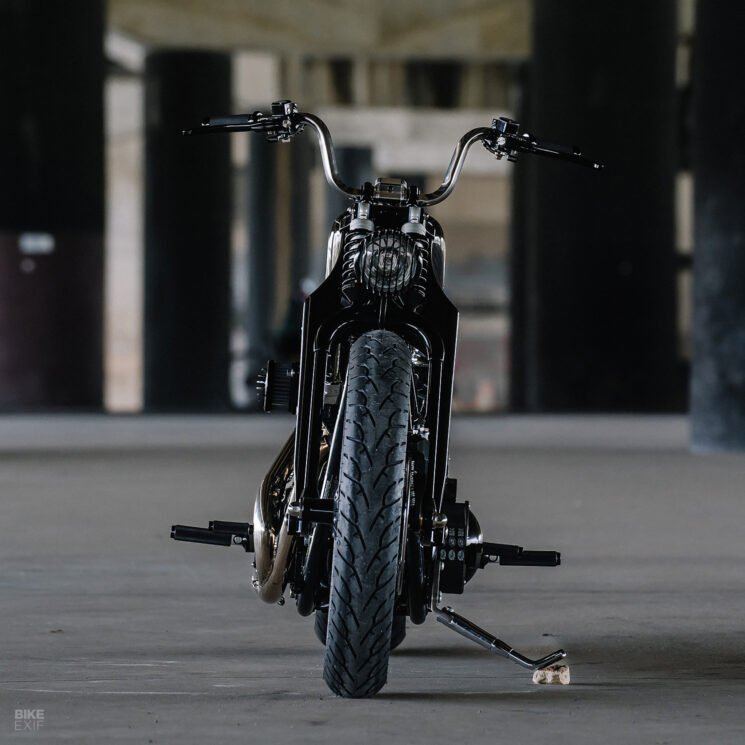
As we’ve come to expect from Rough Crafts, every part is pixel-perfect. A bolt-on Rough Crafts ‘Guerilla’ fuel tank perches atop the Softail frame, mounted high and far back to add a little Frisco style. A bespoke solo seat sits behind it, followed by a tight rear fender that has just the slightest kick in its tail.

There’s no front fender—just a small headlight covered in a vertical grill; a hallmark of Rough Crafts’ bikes since day one.

Custom Harley Springer Softail by Rough Crafts
The cockpit wears a set of mini-ape bars, held in place by Rough Crafts risers. The grips are RC x Arlen Ness items, and the controls and switches are from Rebuffini. A tiny Motogadget speedo sits in the middle of the bars.

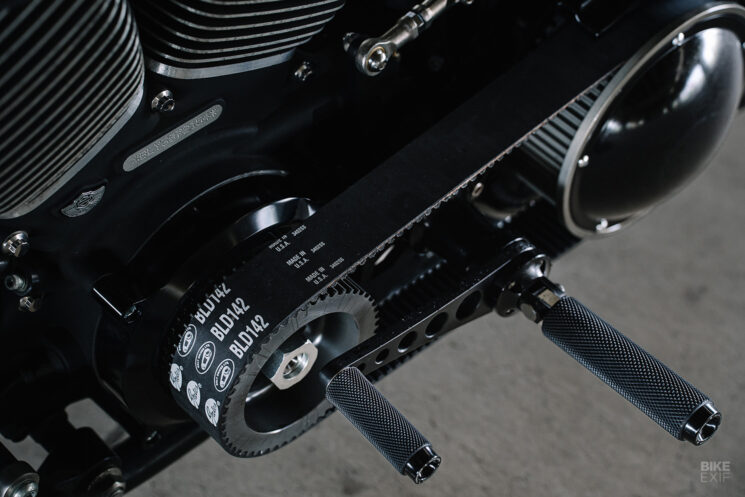
Koso LED turn signals hang from the handlebars, with three-in-one Koso LEDs attached to the swingarm to act as taillights and rear turn signals. The mid-mounted foot controls are from Famous Fabricator, while the actual pegs are, once again, from the RC x Arlen Ness catalog.

Custom Harley Springer Softail by Rough Crafts
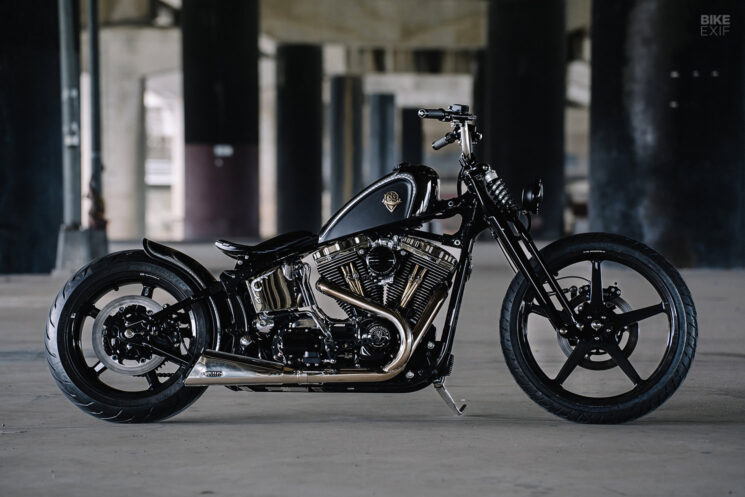
The engine internals are stock, but the exterior boasts a handful of tasty upgrades. An open belt drive from Belt Drives Ltd dominates the left-hand side, Roland Sands rocker box covers sit up top, and a Rough Crafts intake pokes out on the right. The Harley’s been converted from a belt to a chain drive too, with an RK Takasago chain and Supersprox sprockets.

An elegant two-into-one exhaust adds a finishing touch, sporting a pseudo-fishtail muffler. It’s a style that Winston’s been playing with lately, and it’s a welcomed break from the garden variety exhaust systems you typically see on old Softails.

Custom Harley Springer Softail by Rough Crafts
Nicknamed ‘Imperium Talon,’ Rough Crafts’ Harley Springer Softail was put together by Winston’s usual coterie of collaborators. CT-Garage handled the heavy lifting, SFC Simon Fiber Craft added the lush carbon fiber accents, and Rover Works Custom Paint and Rebirth Sign Painter teamed up to execute the livery.

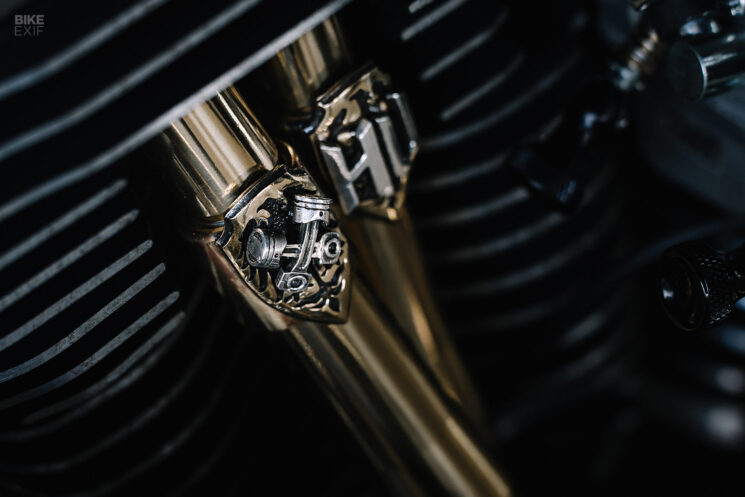
Finally, 2 Abnormal Sides created a pair of Rough Crafts tank badges, plus collars to mount on the custom brass pushrod tubes. With judicious chrome and brass details shining against the mostly-black finishes, this Softail is Rough Crafts at its best.

Rough CraftsFacebook | Instagram | Images by Daryl Chung Imaging Studio

Custom Harley Springer Softail by Rough Crafts


from Bike EXIF https://ift.tt/WneoZAs